TamaFi: Wi-Fi-eating virtual pet on ESP32-S3
A Tamagotchi-style pet on an ESP32-S3 with a color TFT that eats nearby Wi-Fi networks to stay healthy.

Photos
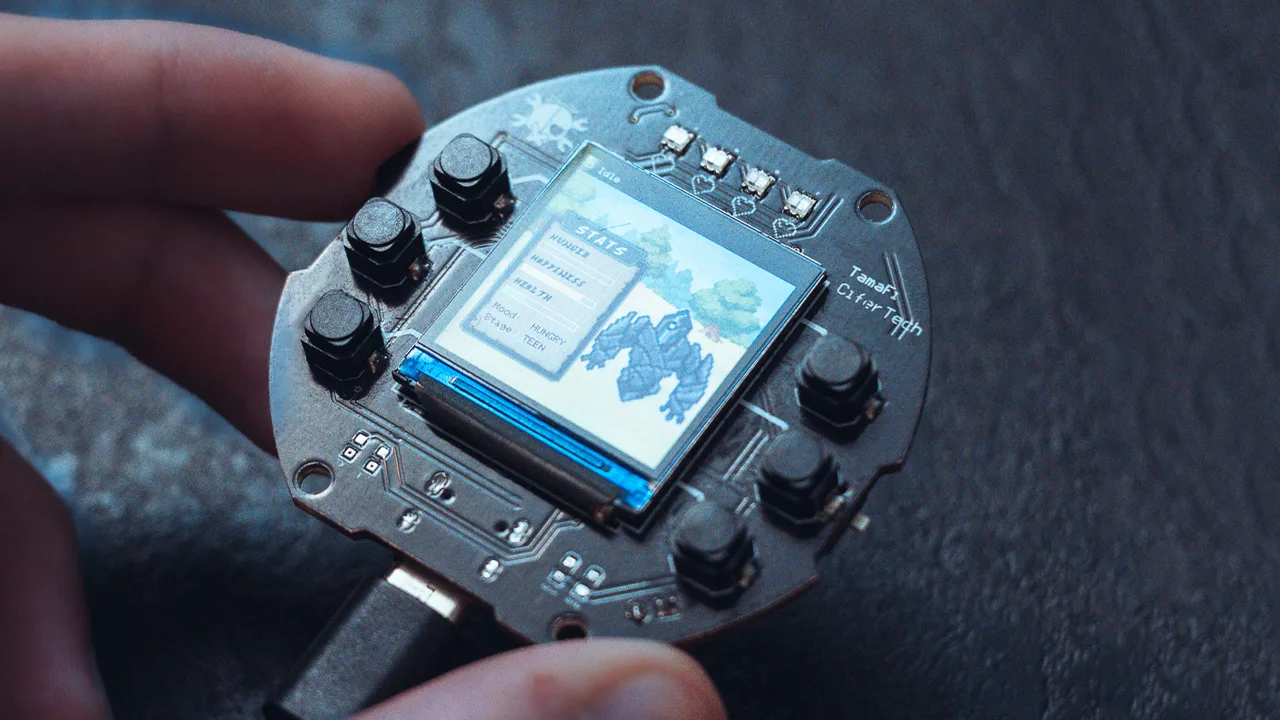
Photos: cifertech/TamaFi
Key Facts
- Chip: ESP32-S3
- Display: 240x240 ST7789 TFT
- Mechanic: passive Wi-Fi scan feeds the pet
- Build: custom PCB (V2)
About This Project
TamaFi is a modern take on the virtual pet. The creature lives on an ESP32-S3 with a 240x240 ST7789 screen, and nearby Wi-Fi networks (scanned passively) affect its hunger, happiness and health. Version 2 adds a compact custom PCB and an autonomous behaviour engine where the pet hunts, rests and evolves. A fun desk toy and a gentle intro to Wi-Fi scanning and sprite graphics.
Source & Attribution
Parts Needed
- ESP32-S3 (or the TamaFi V2 PCB)
- ST7789 240x240 TFT
- Push buttons
- LiPo battery
- 4x WS2812-2020 NeoPixels (on the V2 PCB)
- USB data cable
Steps
- 1
Get the hardware
Order the V2 PCB from the repo's hardware files, or breadboard an ESP32-S3 with an ST7789 display, buttons and NeoPixels, following the pin mapping in the docs.
- 2
Install the Arduino IDE
Add the ESP32 board package and the display and NeoPixel libraries listed in the documentation.
- 3
Open and configure
Open the firmware sketch. Check the pin definitions match your build and select an ESP32-S3 board with USB CDC enabled.
- 4
Upload
Upload over the S3's native USB, or through the optional CP2102 on the V2 board.
- 5
Raise your pet
Hatch the egg, then 'hunt' to feed it on nearby Wi-Fi. Leaving it without networks makes it bored. Its stats and evolution stage are saved in flash between power cycles.
Not included: 3D-printed case, wire, solder, USB cable
Related Projects